Imagine being able to create authentic, restaurant-quality pizza in the comfort of your own home. With an Ooni pizza oven, this is now a reality. The key to achieving that perfect crust lies in the quality of your homemade dough.
Having the right homemade pizza dough recipe is crucial. It’s the foundation upon which your entire pizza is built. A good recipe ensures your crust is crispy on the outside and soft on the inside, just like your favorite pizzeria.

By mastering the art of making Ooni pizza dough, you’ll be able to experiment with a variety of toppings and flavors, creating a truly personalized pizza experience.
Key Takeaways
- Mastering the art of homemade dough is key to achieving a perfect crust.
- A good homemade pizza dough recipe is essential for a delicious pizza.
- Using an Ooni pizza oven allows for a crispy outside and soft inside crust.
- Experiment with various toppings and flavors to create a personalized pizza.
- Having the right recipe is crucial for achieving restaurant-quality pizza at home.
The Secret to Perfect Ooni Pizza Starts with the Dough
Achieving the perfect Ooni pizza begins with understanding the intricacies of its foundation: the dough. To create a truly exceptional pizza, it’s crucial to consider the unique demands of cooking with an Ooni pizza oven.
Why Ooni Pizza Ovens Require Special Consideration
Ooni pizza ovens are designed to cook pizzas at extremely high temperatures, typically between 500°F to 900°F (260°C to 482°C). This intense heat requires a dough that can cook rapidly while still developing a complex flavor profile. To achieve this, your dough must be formulated and prepared with the Ooni oven’s capabilities in mind.
The Science Behind Great Pizza Dough
The science behind great pizza dough involves understanding yeast fermentation and gluten development. Yeast fermentation contributes to the dough’s rise and flavor, while gluten development provides the dough’s structure and texture. A well-balanced dough will have the right mix of these elements, resulting in a crust that is both crispy and chewy.
| Key Factor | Description | Impact on Dough |
|---|---|---|
| Yeast Fermentation | Process by which yeast converts sugars into carbon dioxide gas | Contributes to rise and flavor development |
| Gluten Development | Process of gluten strands forming and strengthening | Provides dough structure and texture |
| Temperature | High temperatures accelerate yeast activity and cooking | Affects cooking time and crust formation |
Essential Ingredients for Your Ooni Pizza Dough
To achieve an authentic pizza dough recipe, it’s crucial to focus on the quality and balance of your ingredients. The right combination of ingredients will elevate your homemade pizza to a new level, making it comparable to those from your favorite pizzeria.
Flour Selection: The Foundation of Great Pizza
The type of flour you choose is fundamental to creating a great pizza crust. For an authentic pizza dough recipe, it’s recommended to use high-protein flours such as Caputo or All-Purpose flour with a high protein content. These flours provide the structure and chewiness that characterizes a great Neapolitan-style pizza.
Here’s a comparison of different types of flour you can use for your pizza dough:
| Flour Type | Protein Content | Best For |
|---|---|---|
| Caputo Flour | 12% | Neapolitan-style pizzas |
| All-Purpose Flour | 10-12% | Versatile, various pizza styles |
| Bread Flour | 13-14% | Pizzas requiring a chewier crust |
Water, Yeast, and Salt: Balancing the Basics
Water, yeast, and salt are the other fundamental ingredients in your pizza dough. Water hydrates the flour, yeast fermentation gives the dough its rise, and salt enhances flavor and controls yeast growth. Balancing these ingredients is key to an easy pizza dough recipe that yields great results.
For an ideal balance, consider the following ratios:
- Water: 60-70% of the flour’s weight
- Yeast: 0.1-1% of the flour’s weight, depending on the type and desired fermentation time
- Salt: 2-3% of the flour’s weight
Optional Ingredients to Enhance Your Dough
While flour, water, yeast, and salt are the basics, you can enhance your dough with optional ingredients. Olive oil can improve flavor and dough handling, while sugar can aid yeast fermentation. Some recipes also include diastatic malt to enhance browning and flavor.
Equipment You’ll Need for Perfect Pizza Dough
The right tools can make all the difference in creating perfect pizza dough. To get started, you’ll need a few essential pieces of equipment to ensure your dough develops properly.
Must-Have Tools for Mixing and Kneading
To begin, you’ll need a large mixing bowl, preferably made of stainless steel or glass, to combine your ingredients effectively. A stand mixer with a dough hook attachment can significantly simplify the kneading process, though you can also knead by hand with a bit of elbow grease. For manual mixing, a wooden spoon or a dough whisk is necessary.
- A large mixing bowl (stainless steel or glass)
- Stand mixer with dough hook attachment (optional)
- Wooden spoon or dough whisk for manual mixing
Storage and Proofing Essentials
Once your dough is mixed and kneaded, you’ll need the right containers for proofing and storing it. A lightly oiled bowl covered with plastic wrap or a damp towel is ideal for the first rise. For longer storage, consider using airtight containers or zip-top bags to keep your dough fresh.
The Ultimate Ooni Pizza Dough Recipe: Step-by-Step Guide
The foundation of a great Ooni pizza lies in its dough, and we’re here to guide you through making the ultimate Ooni pizza dough. With this recipe, you’ll be able to create delicious pizzas that rival those from your favorite pizzerias.
Measuring and Mixing Your Ingredients
To start, you’ll need to measure out your ingredients accurately. Use a digital scale to measure 500g of flour, 350ml of water, 10g of salt, and 1g of yeast. Once you have your ingredients measured, combine the flour, salt, and yeast in a large mixing bowl. Gradually add the water while mixing the ingredients together using a wooden spoon or a stand mixer with a dough hook attachment.
Mix the ingredients until they form a shaggy dough. Don’t overmix at this stage; it’s okay if the dough looks a bit rough.
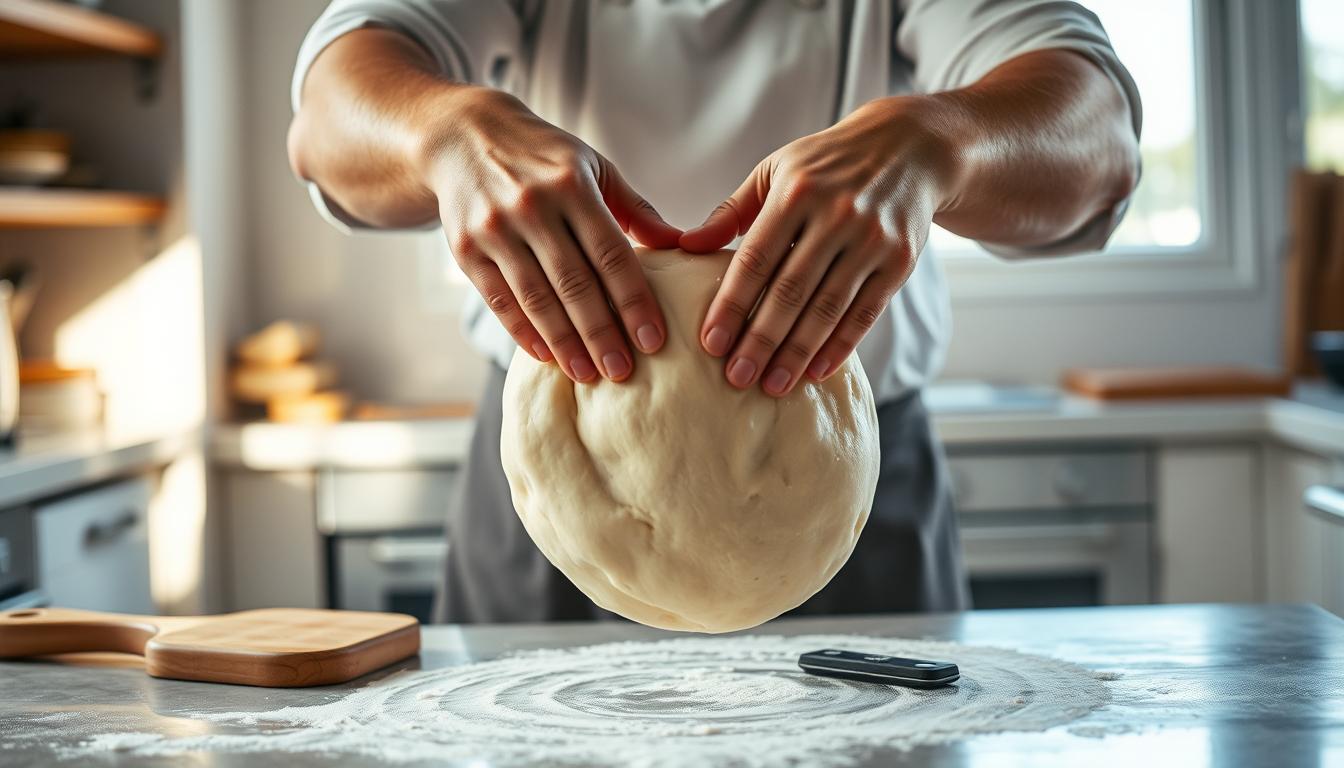
Kneading Techniques for Perfect Texture
Kneading is a crucial step in developing the gluten in your dough, which will give your crust its characteristic chew. You can knead the dough by hand or using a stand mixer with a dough hook attachment.
To knead by hand, place the dough on a floured surface and knead for about 10 minutes, until the dough becomes smooth and elastic. If using a stand mixer, knead for about 5 minutes.
| Kneading Method | Time | Result |
|---|---|---|
| By Hand | 10 minutes | Smooth, elastic dough |
| Stand Mixer | 5 minutes | Smooth, elastic dough |
First Rise: Time and Temperature Considerations
After kneading, place the dough in a lightly oiled bowl, cover it with plastic wrap or a damp towel, and let it rise in a warm, draft-free place. The ideal temperature for the first rise is between 75°F to 80°F (24°C to 27°C). Let the dough rise for about 1 to 2 hours, or until it has doubled in size.
It’s essential to be patient during this step, as the rise time can vary depending on the temperature and the yeast’s activity.
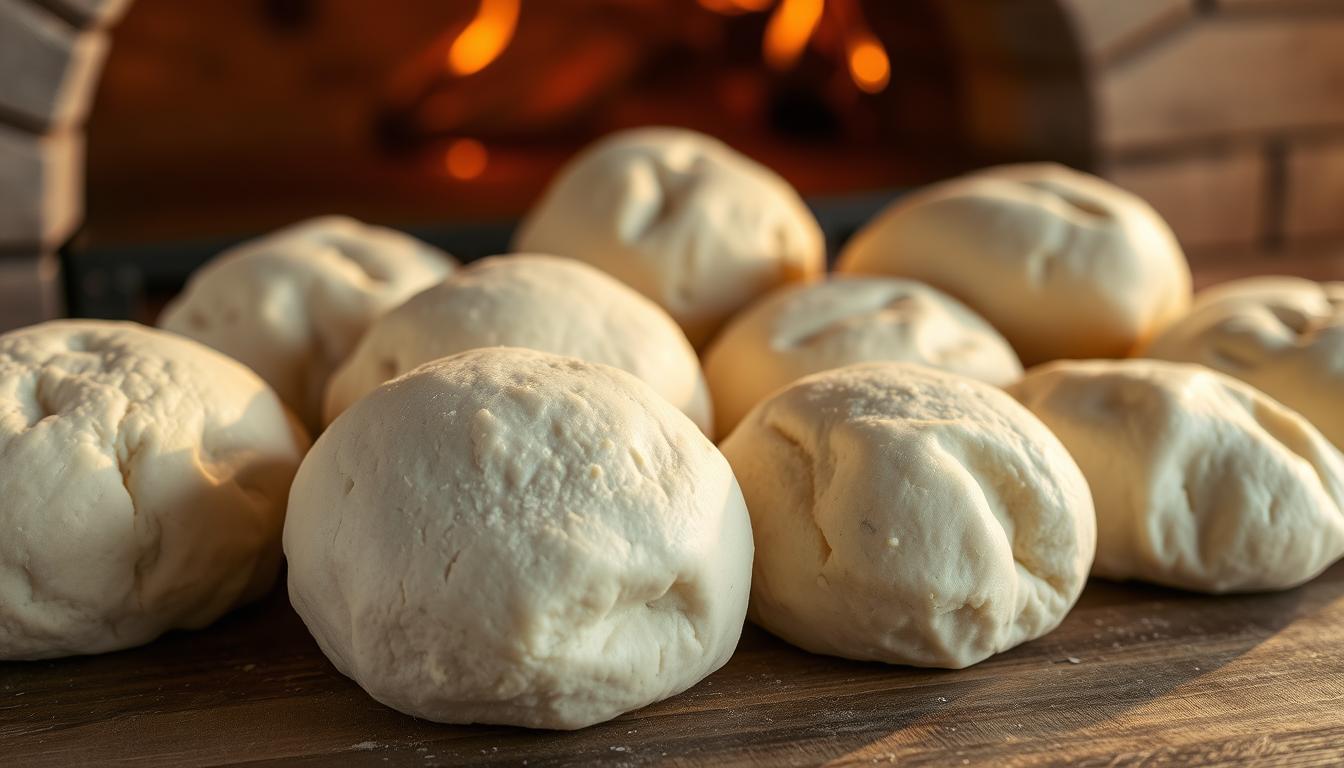
Dividing and Shaping Your Dough Balls
Once the dough has risen, it’s time to divide it into individual portions. For Ooni pizzas, you’ll typically want to divide the dough into 250g to 300g balls. Shape each portion into a smooth ball by folding the dough under itself and then sealing it.
Place the shaped dough balls onto a lightly floured surface or a proofing tray, leaving enough space between them to allow for expansion. Cover them with plastic wrap or a damp towel to prevent drying out.
By following these steps, you’ll be well on your way to creating delicious Ooni pizzas at home with your very own delicious pizza dough recipe.
Proofing and Fermentation: The Key to Flavor Development
To achieve the best pizza dough recipe, understanding the intricacies of proofing and fermentation is essential. These processes are not just about letting the dough rise; they’re about developing the complex flavors and textures that make a pizza truly exceptional. Whether you’re a seasoned pizza maker or just starting out, mastering proofing and fermentation will elevate your homemade pizzas to a new level.
Cold Fermentation vs. Room Temperature Proofing
The debate between cold fermentation and room temperature proofing is ongoing among pizza enthusiasts. Cold fermentation, which involves letting the dough rise in the refrigerator, can take anywhere from 24 to 72 hours. This slow process develops a more complex flavor profile. On the other hand, room temperature proofing is faster, typically taking 1-2 hours, and is more convenient for those short on time.
- Cold fermentation enhances flavor complexity.
- Room temperature proofing is quicker and more convenient.
How to Tell When Your Dough is Perfectly Proofed
Determining when your dough has reached the perfect level of proofing is crucial. Look for visual cues such as a doubling in size and a few large bubbles on the surface. The dough should feel soft and springy to the touch, not dense or soggy. For a more precise measurement, you can use the ‘poke test’: gently poke the dough with your finger; if it springs back slowly and leaves a slight indentation, it’s ready.
Stretching and Shaping Your Ooni Pizza Dough
The art of stretching and shaping pizza dough is essential for achieving that perfect Ooni pizza crust. This process requires a combination of technique, patience, and practice to master. As you work with your dough, you’ll develop the skills needed to create an authentic pizza dough recipe that rivals your favorite pizzeria.
Hand-Stretching Techniques for Authentic Results
Hand-stretching is a traditional method used to shape Neapolitan-style pizzas. To start, gently hold your dough ball and begin to stretch it outward from the center, working your way around the circle. Use your fingertips to press down on the dough, creating a slight crust around the edges. This technique helps to achieve a delicate balance between a crispy crust and a soft center.
As you stretch, rotate the dough to maintain even thickness and prevent tears. Remember, the goal is to create a smooth, rounded shape that will hold your toppings evenly. With practice, you’ll develop the muscle memory needed to stretch your dough with confidence.
Common Shaping Mistakes to Avoid
When shaping your Ooni pizza dough, there are several common mistakes to watch out for. One of the most frequent errors is overworking the dough, which can lead to a tough, dense crust. To avoid this, handle the dough gently and minimize the amount of time spent shaping.
Another mistake is uneven thickness, which can cause some areas of the crust to burn before others. To prevent this, ensure that your dough is evenly stretched and that the edges are not too thick. Refer to the table below for a summary of common shaping mistakes and their solutions.
| Mistake | Solution |
|---|---|
| Overworking the dough | Handle the dough gently and minimize shaping time |
| Uneven thickness | Ensure even stretching and check edge thickness |
| Tears in the dough | Rotate dough while stretching and avoid overstretching |
By mastering the art of stretching and shaping your Ooni pizza dough, you’ll be well on your way to creating delicious, easy pizza dough recipe-style pizzas at home. With practice and patience, you’ll develop the skills needed to produce authentic Neapolitan-style pizzas that are sure to impress.
Why This Ooni Pizza Dough Recipe Works So Well
Our Ooni pizza dough recipe is specifically designed to thrive in high-temperature Ooni ovens, producing a perfectly cooked crust every time. The combination of carefully selected ingredients and a precise preparation process ensures that your pizzas turn out crispy on the outside and soft on the inside, just like those from a traditional wood-fired oven.
The key to this recipe’s success lies in its ability to withstand the intense heat of an Ooni pizza oven. High-temperature cooking is essential for achieving the characteristic leopard-spotted crust associated with Neapolitan-style pizzas. By using a dough recipe that is tailored to these extreme conditions, you can achieve professional-quality results in the comfort of your own home.
How This Dough Performs in High-Temperature Ooni Ovens
When cooked in an Ooni pizza oven, this dough recipe produces a crust that is both crispy and well-cooked. The high temperatures achieved by these ovens allow for a cooking time of just 60-90 seconds, resulting in a perfectly cooked crust. The table below highlights the performance characteristics of this dough recipe in high-temperature Ooni ovens.
| Temperature | Cooking Time | Crust Characteristics |
|---|---|---|
| 500°C/932°F | 60-90 seconds | Crispy, leopard-spotted |
| 450°C/842°F | 90-120 seconds | Soft center, crispy edges |
The Perfect Crust: Characteristics to Expect
With this Ooni pizza oven recipe, you can expect to achieve a crust that is characteristic of wood-fired pizzas. The crust should be crispy on the outside and soft on the inside, with a delicate balance of flavors. The image below illustrates the perfect crust produced by this recipe.
By following this recipe and using your Ooni pizza oven, you can create delicious, authentic pizzas that are sure to impress. The combination of a well-crafted dough recipe and the high-temperature cooking capabilities of your Ooni oven will result in a truly exceptional pizza-making experience.
Advanced Tips for Ooni Pizza Dough Mastery
The key to exceptional Ooni pizzas lies in the details of your dough preparation. Mastering the art of dough making involves understanding the nuances that elevate a good pizza to a great one. In this section, we’ll explore advanced techniques to refine your homemade pizza dough recipe and achieve consistently delicious results.
Hydration Levels: Finding Your Perfect Balance
Hydration is a critical factor in pizza dough, affecting both texture and flavor. A higher hydration level can result in a more tender crust, but it also increases the risk of a soggy or difficult-to-handle dough. Experimenting with different hydration levels will help you find the perfect balance for your delicious pizza dough recipe. Consider the following table to understand how hydration affects dough characteristics:
| Hydration Level | Dough Characteristics |
|---|---|
| Low (40-50%) | Dense, less tender crust |
| Medium (60-70%) | Balanced texture, easier to handle |
| High (80%+) | Tender crust, potentially soggy if not managed correctly |
Pre-Ferments and Starters for Complex Flavors
Incorporating pre-ferments or starters into your dough can significantly enhance the flavor profile of your Ooni pizzas. These elements introduce complex, developed flavors that result from longer fermentation times. Using a big poola or biga can add depth to your crust, making your pizzas more engaging and delicious.
Adapting Your Recipe to Different Weather Conditions
Weather can significantly impact your dough, with temperature and humidity being key factors. In hot, humid environments, you may need to adjust your recipe to prevent over-proofing, while in cooler, drier conditions, you might need to increase hydration or proofing time. Understanding how to adapt your homemade pizza dough recipe to your local climate will ensure consistent results.
By mastering these advanced techniques, you’ll be well on your way to creating exceptional Ooni pizzas that showcase your skill and dedication to the craft.
Dough Variations for Different Pizza Styles
The art of making pizza lies in the dough, and different styles demand unique dough preparations. Whether you’re a pizza enthusiast or a beginner, understanding these variations can elevate your pizza game.
Different pizza styles, such as Neapolitan, New York-style, and others, require specific dough characteristics. Let’s dive into the details of these variations.
Neapolitan-Style Dough for Traditional Ooni Pizzas
Neapolitan-style dough is known for its soft, chewy center and crispy crust, achieved through a specific balance of ingredients and cooking technique. To make a traditional Neapolitan dough, you’ll need:
- High-quality “00” flour or Caputo flour
- Water with a temperature between 75°F to 80°F
- Natural yeast or active dry yeast
- Salt
This dough is typically fermented at room temperature for a short period, then cooked in a very hot oven, like an Ooni pizza oven, for a short time.
New York-Style Dough Adaptation
New York-style pizza dough is known for its large, thin, and foldable slices. To adapt your dough recipe for New York-style pizza, consider:
- Using a higher-protein flour to achieve a chewier crust
- Allowing the dough to ferment for a longer period to develop more complex flavors
- Stretching the dough to a larger diameter
This style requires a slightly different approach to achieve the characteristic crust that New York-style pizzas are known for.
Experimenting with Alternative Flours
For those looking to experiment, using alternative flours can create unique flavor profiles. Consider using:
- Whole wheat flour for a nuttier flavor
- Rye flour for a denser crust
- Ancient grain flours for added nutrition and distinct flavors
When experimenting with alternative flours, be prepared to adjust your recipe, as these flours can behave differently. Start with small batches to test the results.
Troubleshooting Common Ooni Pizza Dough Problems
Even with the best recipe, Ooni pizza dough can sometimes be finicky. Issues like sticky or dry dough, dough that won’t stretch, and fermentation problems can arise, but don’t worry, these are easy to resolve with the right techniques.
Dealing with Sticky or Too Dry Dough
If your dough is too sticky, it might be due to overhydration or high humidity. Try adding a small amount of flour and kneading it in. On the other hand, if your dough is too dry, it could be due to underhydration or dry environments. Adding a bit more water can help. It’s all about finding the right balance.
Fixing Dough That Won’t Stretch
Dough that won’t stretch can be frustrating. This issue often arises from overworking the dough or letting it proof for too long. Gently kneading the dough and letting it rest can help restore its elasticity.
Resolving Fermentation Issues
Fermentation problems can occur due to incorrect temperatures or yeast issues. Ensure your yeast is fresh and that you’re storing your dough at the right temperature. A consistent environment is key to proper fermentation.
| Issue | Cause | Solution |
|---|---|---|
| Sticky Dough | Overhydration, high humidity | Add flour, knead |
| Dry Dough | Underhydration, dry environment | Add water |
| Dough won’t stretch | Overworking, overproofing | Knead gently, rest |
| Fermentation issues | Incorrect temperature, yeast problems | Check yeast, adjust temperature |
Storing and Freezing Your Pizza Dough
To enjoy your homemade pizza dough at its best, understanding how to store and freeze it is crucial. Proper storage and freezing techniques can help maintain the dough’s quality and freshness.
Short-Term Storage Methods
For short-term storage, you can keep your pizza dough in the refrigerator. Simply place the dough in an airtight container or plastic bag, making sure to remove as much air as possible before sealing. This method allows you to store the dough for up to 3 days. It’s essential to keep the dough at a consistent refrigerator temperature to slow down fermentation.
Freezing and Thawing for Future Use
For longer storage, freezing is an excellent option. Divide your dough into individual portions, shape them into balls, and wrap each ball tightly in plastic wrap or aluminum foil. Place the wrapped dough balls in a freezer-safe bag, removing as much air as possible before sealing. Frozen dough can be stored for up to 3 months. When you’re ready to use it, simply thaw the dough in the refrigerator overnight or at room temperature for a few hours. As a tip, label the bags with the date to keep track of how long they’ve been frozen.
Conclusion: Perfecting Your Ooni Pizza Dough Journey
Mastering the art of Ooni pizza dough is a journey that requires patience, practice, and persistence. With the right ooni pizza dough recipe and techniques, you can achieve professional-quality pizzas at home. By following the steps outlined in this guide, you’ve learned how to create a delicious pizza dough recipe that yields a perfectly cooked crust.
As you continue to refine your skills, remember that the key to a great Ooni pizza lies in the dough. Experiment with different ingredients, techniques, and temperatures to find your perfect combination. With time, you’ll develop the skills to craft delicious pizzas that rival those from your favorite pizzerias.
Now that you’ve reached the end of this guide, it’s time to put your knowledge into practice. Start by making a batch of dough using the ooni pizza dough recipe provided, and don’t be discouraged if it takes a few attempts to get it just right. With each try, you’ll get closer to creating the perfect pie.
FAQ
What is the best type of flour to use for Ooni pizza dough?
The best type of flour to use for Ooni pizza dough is a high-protein flour, such as Caputo or All-Purpose flour with a high protein content, as it provides the necessary structure and texture for a Neapolitan-style crust.
How long should I let my Ooni pizza dough rise?
The rising time for Ooni pizza dough can vary depending on factors like temperature and yeast activity, but a general guideline is to let it rise for at least 1-2 hours at room temperature or 24 hours in the refrigerator for cold fermentation.
Can I use a homemade pizza dough recipe in my Ooni pizza oven?
Yes, you can use a homemade pizza dough recipe in your Ooni pizza oven, but it’s essential to consider the specific requirements of your oven, such as high-temperature tolerance and cooking time, to achieve the best results.
How do I achieve the perfect crust with my Ooni pizza dough?
To achieve the perfect crust, ensure your dough is properly proofed, and your Ooni oven is preheated to the correct temperature. Cooking the pizza for the right amount of time, usually around 1-2 minutes, will also help you achieve a well-cooked crust.
Can I freeze Ooni pizza dough for later use?
Yes, you can freeze Ooni pizza dough for later use. Simply shape the dough into balls, place them on a baking sheet lined with parchment paper, and freeze until solid. Then, transfer the frozen dough balls to an airtight container or freezer bag for storage.
What are some common mistakes to avoid when making Ooni pizza dough?
Common mistakes to avoid when making Ooni pizza dough include overworking the dough, using too much or too little water, and not allowing the dough to proof properly. These mistakes can lead to a dense or uneven crust.
How do I know when my Ooni pizza dough is perfectly proofed?
To determine if your Ooni pizza dough is perfectly proofed, check for signs like a slightly puffed appearance, a soft and relaxed texture, and a slightly sour aroma. You can also perform the “finger test” by gently pressing your finger into the dough; if it springs back slowly, it’s ready.
Can I adapt the Ooni pizza dough recipe for different pizza styles?
Yes, you can adapt the Ooni pizza dough recipe for different pizza styles, such as Neapolitan, New York-style, or others, by adjusting factors like hydration levels, yeast content, and proofing times to achieve the desired characteristics.
You might like!
- How to Master the Chicken Chilli Dry Recipe in 7 Easy Steps
- Easy 5-Ingredient Chicken Pulao Recipe for Busy Days
- 5 Tips for an Unforgettable Grilled Fish Burger Recipe
- Delicious Eggless Burger Bun Recipe – Easy & Homemade
- 3 recipes to how to make sweet buns at home
If you have any questions or inquiries, please contact us in the page or in email [email protected] or my instagram


