Who doesn’t love a sweet treat that’s both fun to make and delightful to eat? Making homemade candies can be a great way to spend quality time with family and friends. With a simple crystal candy recipe, you can create a delightful homemade treat that’s sure to impress.
Craving a sweet, homemade treat? This Crystal Candy recipe is easy to make and perfect for satisfying your sugar cravings. Try it today
You can easily make crystal candy at home with just a few ingredients. The process is straightforward, and the result is a deliciously sweet treat that’s perfect for snacking or sharing with others. By following this easy recipe, you’ll be able to create a delightful homemade treat that’s sure to become a favorite.
Key Takeaways
- Make crystal candy at home with a simple recipe
- Create a delightful homemade treat that’s perfect for snacking or sharing
- Use just a few ingredients to make a deliciously sweet treat
- Enjoy quality time with family and friends while making homemade candies
- Impress others with your homemade crystal candy
The Magic of Homemade Crystal Candy
The allure of crystal candy lies in its sparkling, crystalline structure. Homemade crystal candy is not only a treat for the taste buds but also a feast for the eyes. You can create these delightful sweets in the comfort of your own home with a few simple ingredients.
What Are Crystal Candies?
Crystal candies, often referred to as rock candy, are sweets that are formed through the process of crystallization. This process involves dissolving sugar in water to create a supersaturated solution, which is then allowed to crystallize over time. The result is a candy that is both visually appealing and delicious.
The Science Behind Sugar Crystallization
The science behind sugar crystallization is fascinating. When a sugar solution is heated, the sugar dissolves, creating a supersaturated solution. As the solution cools, the sugar molecules start to come together, forming crystals. The rate of cooling and the presence of a nucleation site, such as a string or stick, can influence the size and shape of the crystals. By controlling these factors, you can create crystals of varying sizes and shapes, making each piece of crystal candy unique.
| Factor | Effect on Crystallization |
|---|---|
| Rate of Cooling | Influences crystal size and shape |
| Nucleation Site | Provides a site for crystal formation |
| Supersaturation | Essential for crystallization to occur |
Understanding the science behind sugar crystallization can help you perfect your crystal candy-making skills. With practice and patience, you can create beautiful and delicious crystallized sugar sweets that are sure to impress.
Types of Crystal Candy You Can Make at Home
Making crystal candy at home is a fun and rewarding experience. You can create a variety of crystal candies using different techniques and ingredients. Here, we’ll explore three types of crystal candies you can make: classic rock candy, kohakutou, and crystallized sugar sweets.
Classic Rock Candy on a Stick
Classic rock candy on a stick is a timeless treat that is easy to make at home. To make it, you’ll need granulated sugar, water, and a string or stick to hang your candy on. By dissolving the sugar in water and then boiling it to create a supersaturated solution, you can grow crystals on your string or stick. With a bit of patience, you’ll have a beautiful rock candy stick in no time.

Kohakutou: Japanese Crystal Jelly Candy
Kohakutou is a traditional Japanese crystal jelly candy that is both beautiful and delicious. To make kohakutou, you’ll need sugar, water, and agar agar powder. By mixing the sugar and agar agar powder with water and then heating it to create a gel-like solution, you can create crystal clear jelly candies. You can flavor your kohakutou with fruit juice or other flavorings to create unique and tasty treats. If you’re looking for a kohakutou recipe, you can easily find variations online that suit your taste preferences.
Crystallized Sugar Sweets
Crystallized sugar sweets are another type of crystal candy you can make at home. These sweets are made by crystallizing sugar onto a surface, creating a beautiful and intricate design. You can use various flavorings and colorings to create unique and personalized treats. To make crystallized sugar sweets, you’ll need to create a supersaturated sugar solution and then allow it to crystallize onto a surface. With a bit of practice, you can create stunning crystal jelly candy treats that are perfect for gifting or enjoying yourself.
| Type of Crystal Candy | Main Ingredients | Unique Feature |
|---|---|---|
| Classic Rock Candy | Sugar, Water | Grows crystals on a string or stick |
| Kohakutou | Sugar, Water, Agar Agar Powder | Crystal clear jelly texture |
| Crystallized Sugar Sweets | Sugar, Flavorings, Colorings | Intricate crystallized designs |
By following these simple recipes and instructions, you can create a variety of delicious and beautiful crystal candies at home. Whether you’re making classic rock candy, kohakutou, or crystallized sugar sweets, you’ll be sure to impress your friends and family with your homemade crystal candy creations.
Step-by-Step Crystal Candy Recipe
Crystal candy making is an art that involves dissolving sugar in water to create a supersaturated solution. This solution is the foundation for growing crystals, and with the right conditions, you can create beautiful and delicious crystal candies at home.
Ingredients and Equipment List
To make crystal candy, you’ll need a few simple ingredients and some basic equipment. The ingredients include granulated sugar, water, and optional flavorings or colorings. You’ll also need a saucepan, a glass jar or container, a string or stick, and some paper clips or weights. Make sure to use a clean and dry environment to prevent contamination and ensure the best results.
The equipment list includes:
- A medium saucepan
- A glass jar or container with a wide mouth
- A string or stick
- Paper clips or weights
- Optional: flavorings or colorings
Preparing Your Sugar Solution
To prepare the sugar solution, combine 2 cups of granulated sugar with 1 cup of water in a saucepan. Heat the mixture over medium heat, stirring until the sugar is fully dissolved. Remove the saucepan from the heat and let the solution cool slightly. If desired, add flavorings or colorings to the solution and stir well.
Setting Up for Crystallization
To set up for crystallization, you’ll need to create a supersaturated solution and provide a surface for the crystals to form on. Pour the sugar solution into a clean glass jar or container, and suspend a string or stick into the solution. Make sure the string or stick is clean and dry, as this will be the nucleus for crystal formation.
Cover the jar or container with a paper towel or cloth to prevent dust and other contaminants from entering. Let the solution sit in a cool, dry place, away from direct sunlight.
Monitoring the Crystal Formation Process
Over the next few days or weeks, the solution will start to crystallize, and you’ll begin to see crystals forming on the string or stick. Monitor the crystal formation process by checking on the jar or container regularly. You can gently shake the jar or container to encourage even crystal growth.
Harvesting and Finishing Your Candy
Once the crystals have formed to your liking, you can harvest your crystal candy by carefully removing the string or stick from the solution. Rinse the crystals with a small amount of water to remove any excess sugar, and let them dry completely. You can then enjoy your crystal candy as is, or you can coat them in additional sugar or other toppings to enhance the flavor and appearance.
With these simple steps, you can create your own delicious crystal candy at home. Experiment with different flavorings and colorings to create unique and tasty treats.
Creative Variations and Troubleshooting
Take your crystal candy to new heights by trying out unique variations and troubleshooting common issues. With a basic crystal candy recipe under your belt, you can now experiment with different flavors and colors to create one-of-a-kind treats.
Flavor and Color Combinations
One of the joys of making crystal candy is the ability to customize it to your taste preferences. Try adding different extracts, such as peppermint or lemon, to create unique flavor combinations. You can also experiment with various colors by adding food-grade dyes to your sugar solution. For example, adding a few drops of blue dye can create a beautiful, icy blue crystal candy.
Some other flavor combinations to try include:
- Strawberry and lemon for a sweet and tangy taste
- Peppermint and chocolate for a refreshing twist on traditional peppermint bark
- Raspberry and vanilla for a fruity and creamy combination
Presentation and Gifting Ideas
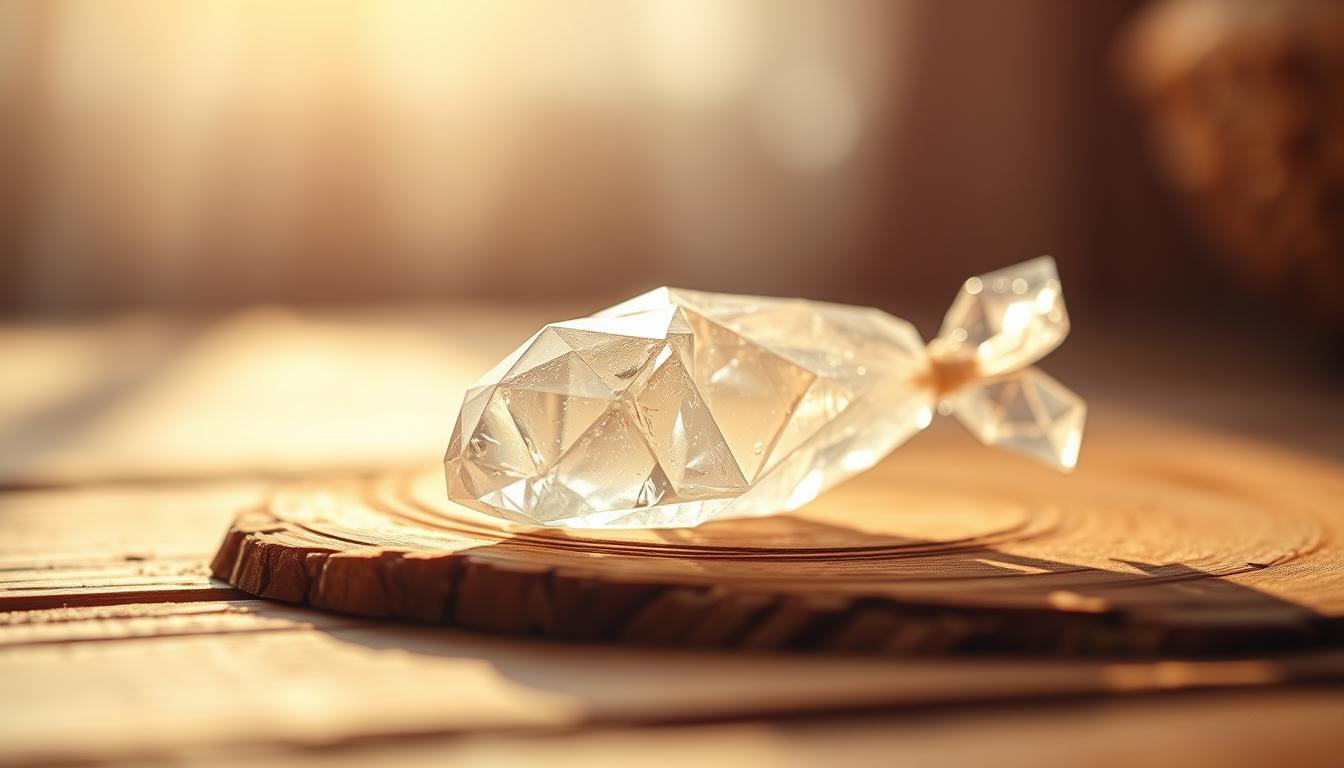
The presentation of your crystal candy can elevate it from a simple treat to a beautiful gift or dessert. Consider displaying your crystal candies on a decorative stick or in a glass jar. You can also wrap individual pieces in cellophane bags and tie them with a ribbon for a charming gift.
Some other presentation ideas include:
- Creating a crystal candy bouquet by arranging the candies on a stick or wire
- Using crystal candies as a topping for ice cream or yogurt
- Incorporating crystal candies into a dessert buffet or candy bar
Storage Tips for Longevity
- To keep your crystal candies fresh and flavorful, it’s essential to store them properly. Store your crystal candies in an airtight container, such as a glass jar or plastic container, to keep them away from moisture and humidity.
| Storage Method | Benefits |
|---|---|
| Airtight Container | Keeps candies fresh and dry |
| Cool, Dry Place | Prevents melting or becoming sticky |
| Avoid Direct Sunlight | Prevents fading or discoloration |
Common Problems and Solutions
- Despite your best efforts, you may encounter some issues when making crystal candy. Here are some common problems and their solutions:
- Crystals not forming: Check that your sugar solution is saturated and that the temperature is consistent.
- Crystals too small: Try increasing the cooling time or using a different type of sugar.
- Crystals too large: Try decreasing the cooling time or using a smaller seed crystal.

Conclusion: Enjoying Your Homemade Crystal Candy
Now that you’ve successfully made your own crystal candy, it’s time to enjoy the fruits of your labor. Savor the sweet, crunchy texture and the satisfaction of creating something truly special. Feel free to experiment with different flavors and colors to create unique variations of this classic treat.
Try pairing your crystal candy with other homemade sweets or using it as a topping for ice cream or yogurt. You can also share your creations with friends and family, making it a fun and delicious way to connect with others. With this crystal candy recipe, the possibilities are endless, and you’re sure to become a master candy maker in no time.
As you continue to explore the world of crystal candy, don’t be afraid to get creative and try new things. Whether you’re making it for a special occasion or just a sweet indulgence, your homemade crystal candy is sure to bring a smile to your face and a touch of magic to your day.
FAQ
What is crystal candy, and how is it made?
Crystal candy, also known as rock candy, is a type of confectionery made by crystallizing sugar on a string or stick. The process involves dissolving sugar in water to create a supersaturated solution, which is then left to cool and crystallize.
What is kohakutou, and how does it differ from traditional rock candy?
Kohakutou is a type of Japanese crystal jelly candy made by crystallizing sugar on a gel-like substance. Unlike traditional rock candy, kohakutou has a softer, more jelly-like texture and is often flavored with fruit or other flavorings.
What are some common problems that can occur when making crystal candy, and how can they be solved?
Common problems when making crystal candy include crystallization not occurring, crystals forming too slowly, or the candy becoming too sticky. These issues can be resolved by adjusting the temperature, humidity, or sugar concentration of the solution, or by using a seed crystal to initiate crystallization.
How do I store crystal candy to maintain its quality and longevity?
To store crystal candy, keep it in an airtight container, away from direct sunlight and moisture. You can also wrap individual pieces in plastic wrap or wax paper to prevent them from becoming sticky or developing off-flavors.
Can I customize the flavor and color of my crystal candy?
Yes, you can customize the flavor and color of your crystal candy by adding different flavorings or food colorings to the sugar solution before crystallization. You can also experiment with different flavor combinations and colors to create unique and creative variations.
Is it safe to make crystal candy at home?
Yes, making crystal candy at home is generally safe, as long as you follow proper food safety guidelines and use clean equipment. Be sure to wash your hands and equipment thoroughly, and avoid cross-contaminating the sugar solution with other ingredients or contaminants.
Can I gift homemade crystal candy to friends and family?
Yes, homemade crystal candy makes a thoughtful and unique gift. You can present it in decorative jars or bags, or wrap individual pieces in decorative paper or cellophane. Consider adding a personalized label or card to make it a special and memorable gift.
Did you like our recipe?
You might like!
- How to Master the Chicken Chilli Dry Recipe in 7 Easy Steps
- Easy 5-Ingredient Chicken Pulao Recipe for Busy Days
- 5 Tips for an Unforgettable Grilled Fish Burger Recipe
- Delicious Eggless Burger Bun Recipe – Easy & Homemade
- 3 recipes to how to make sweet buns at home
- chicken and egg noodles recipe; Your guide to the perfect in 5 tips
- Delicious Sweet Potato Juice Recipe: A Healthy Treat
- Delicious Sweet Potato Dumplings Recipe: A 4 Recipes You’ll Love
- sweet hawaiian crockpot chicken recipe: The Perfect Recipe in 5 stips
- Best Sweet Tomatoes Chimichurri Pizza Recipe
- Chex Mix Sweet Recipe: The Ultimate Crowd-Pleasing Treat
- the Perfect Bison Burger Recipe: Juicy, Tender, and Satisfying
- Delicious Smash Burger Recipe with Onions
- the Perfect Sweet Potato Pie Recipe with Condensed Milk in 5 Steps
- Delicious Pineapple Juice Cake Recipe – Easy & Moist in 2 stips
If you have any questions or inquiries, please contact us in the page contact us or in email [email protected] or my instagram


